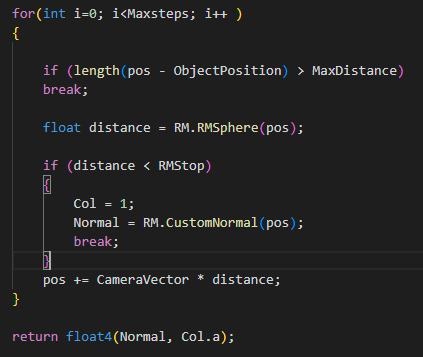
We'll start by creating a custom HLSL node that will do the heavy lifting for us. This node will compute the ray marching against a distance field of a sphere and also compute the normal to allow for correct lighting. The custom HLSL node will return a vector 4, where the R, G, and B components contain information for the normal, and the alpha component contains the distance information, either 0 or 1.
I connected the custom HLSL node to a custom .ush file. This file will contain the actual HLSL code that we'll use to do the ray marching. The .ush file will allow for easier development, as we can write and test the code in a separate file and then easily import it into Unreal Engine.
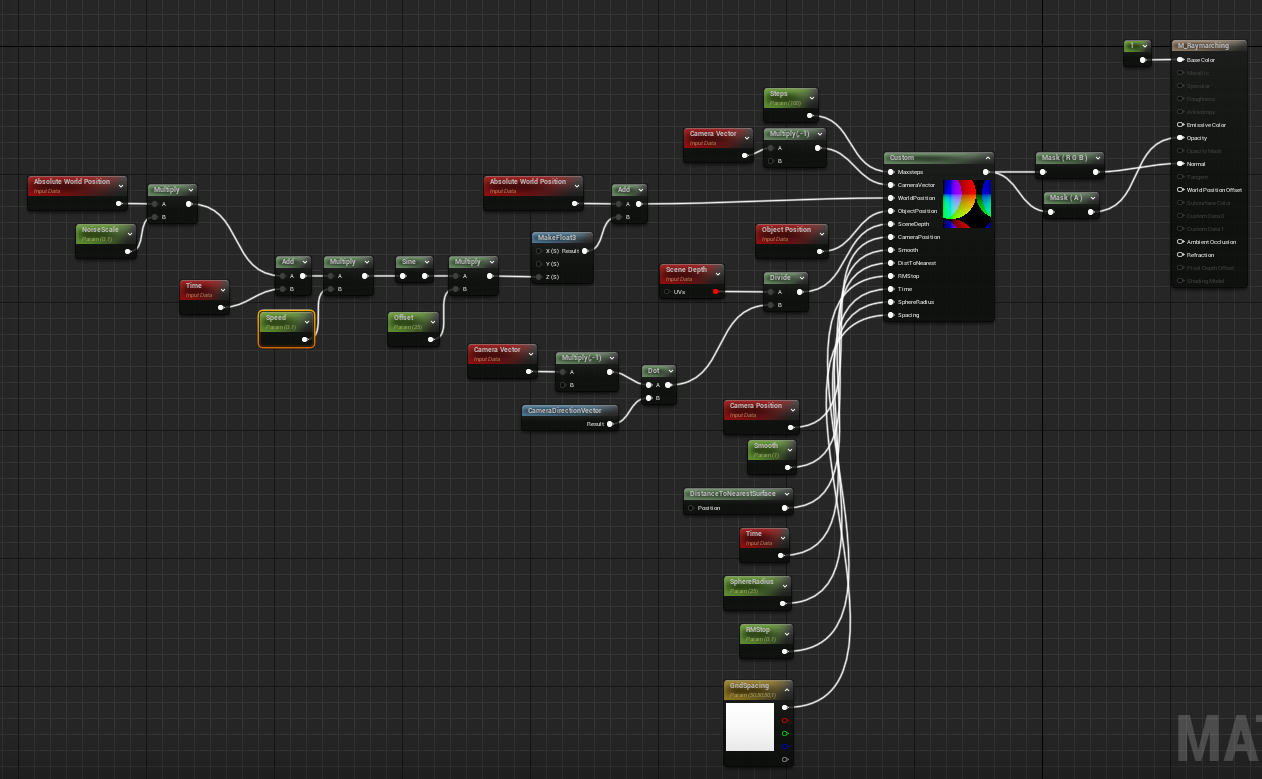
Once we have our custom HLSL node and .ush file set up, we can then start mixing Unreal's material shader nodes with our custom HLSL. By doing this, we can take advantage of Unreal's powerful material shader system and also incorporate our own custom code. In the unreal material graph you can see we are sending information like absolute world position or the camera vector.
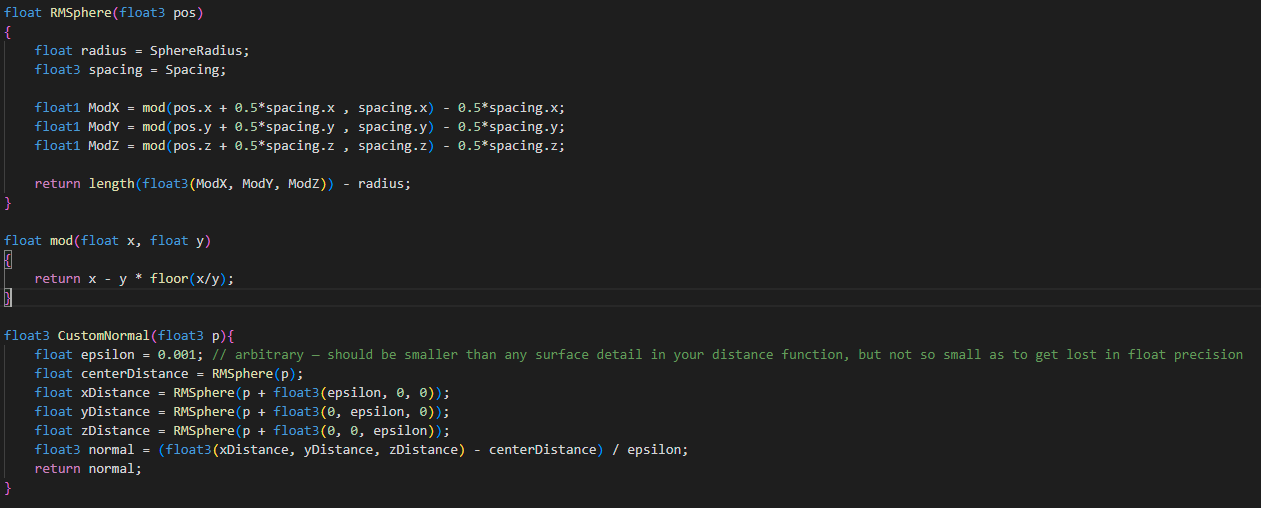
Here is some of the .ush file
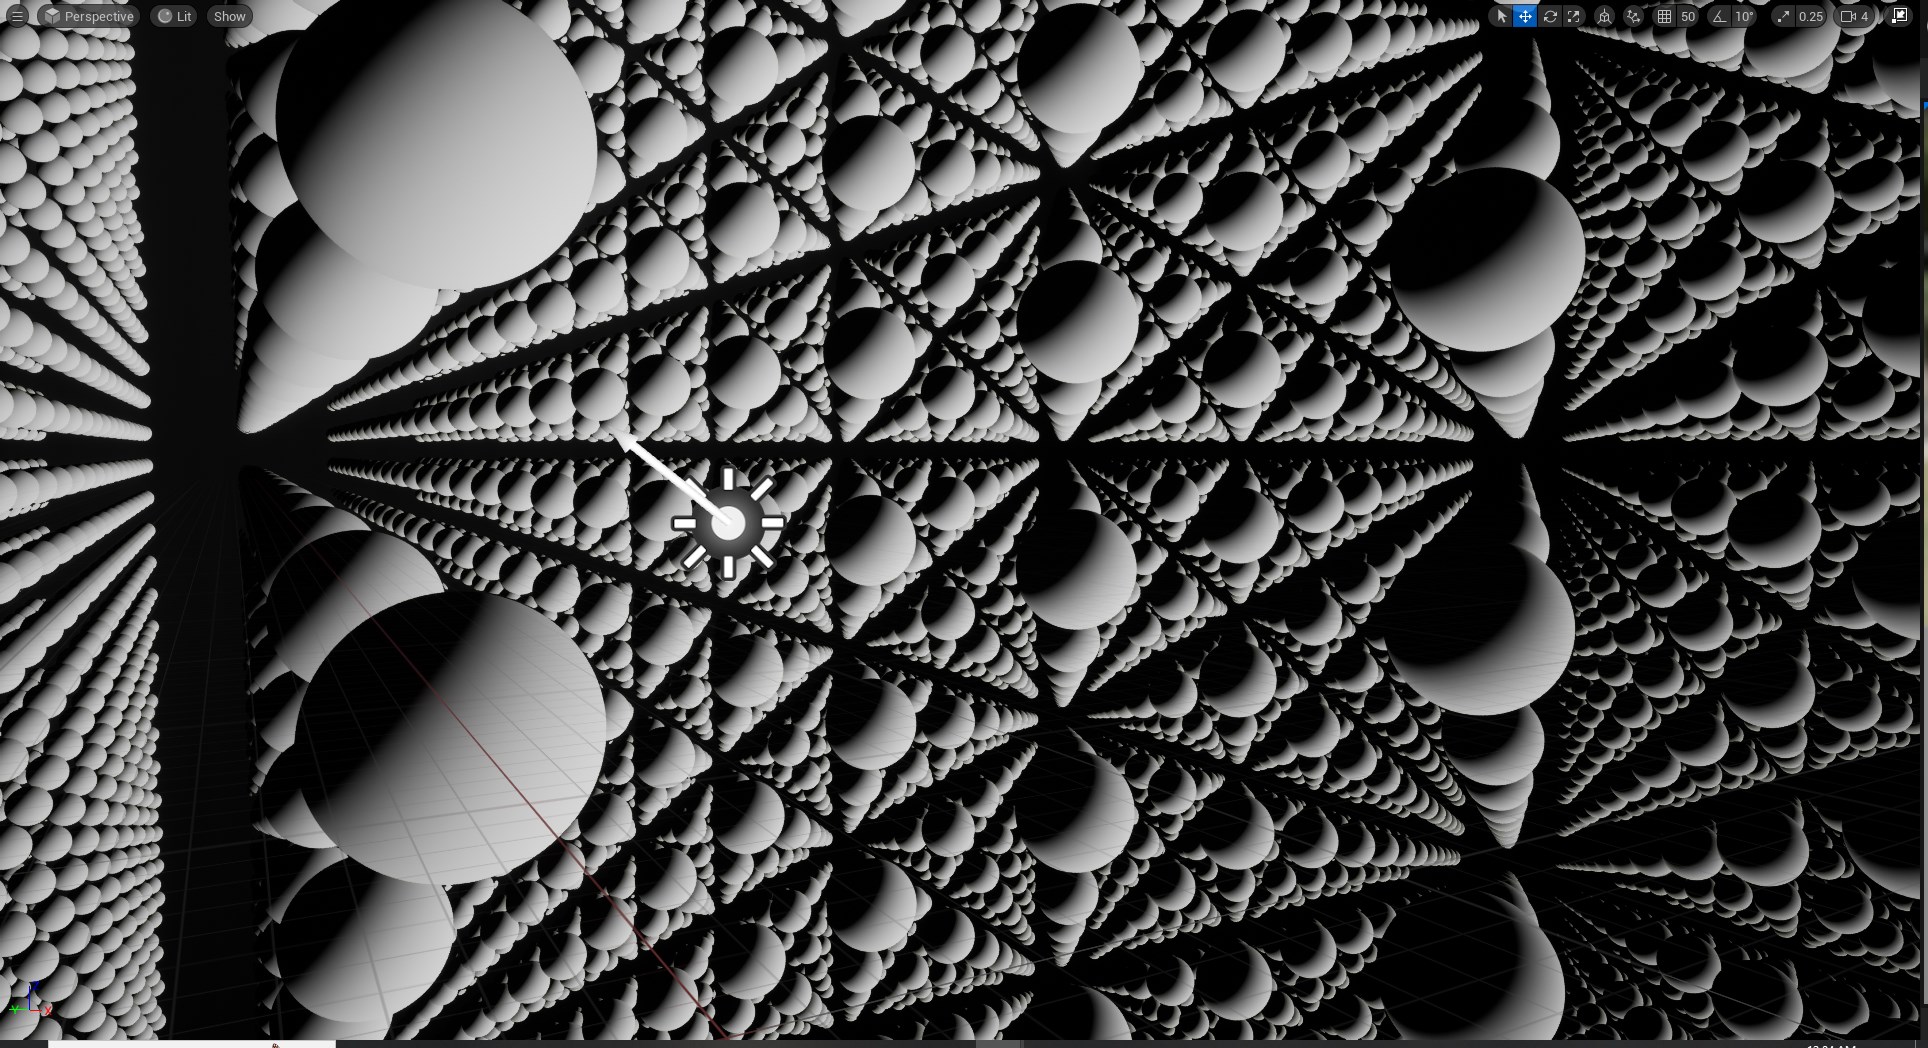
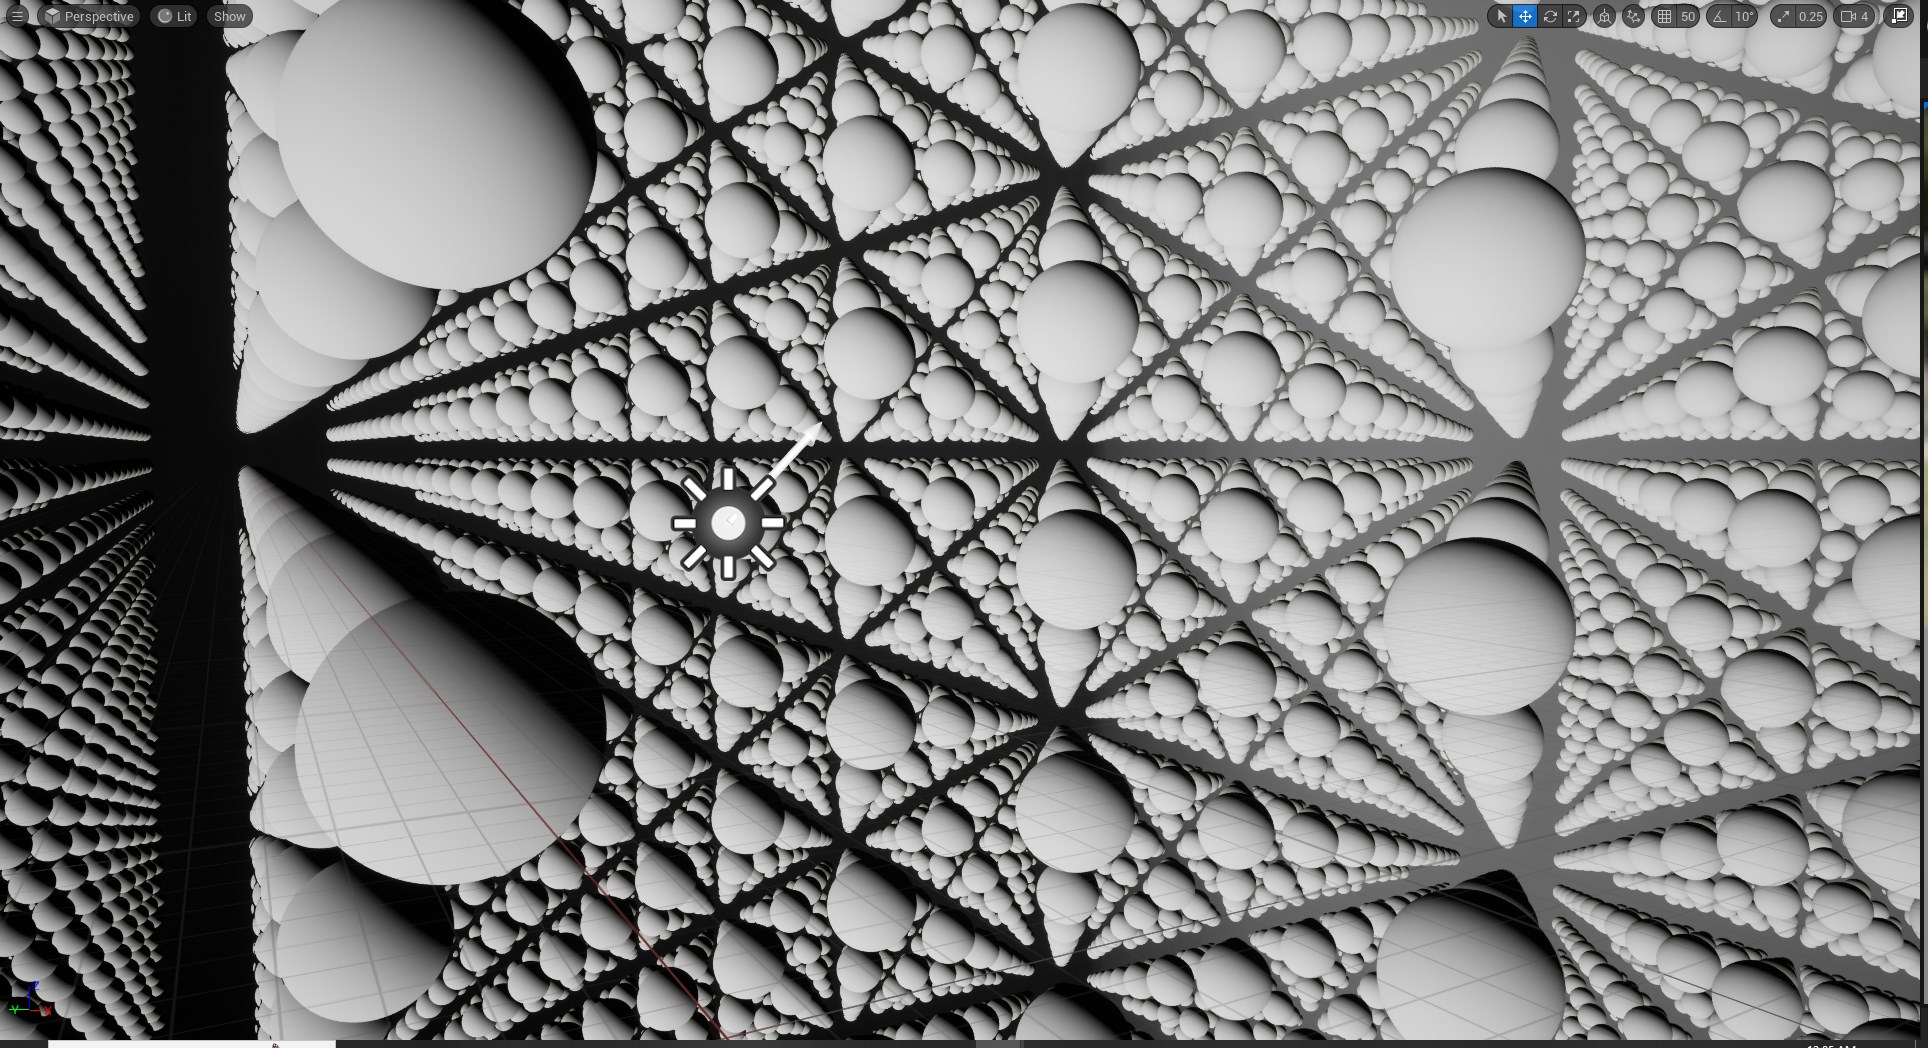
Here we can see that the normal's are being calculated correctly with them respecting the lighting direction
By leveraging the power of signed distance fields and custom HLSL nodes, we can create beautiful and complex materials that would be difficult to achieve with traditional shading techniques.